
Flashing your BIOS
Follow these steps carefully to safely update your motherboard's BIOS.
How to identify your BIOS version
Press Windows + R
This will open the Run dialog
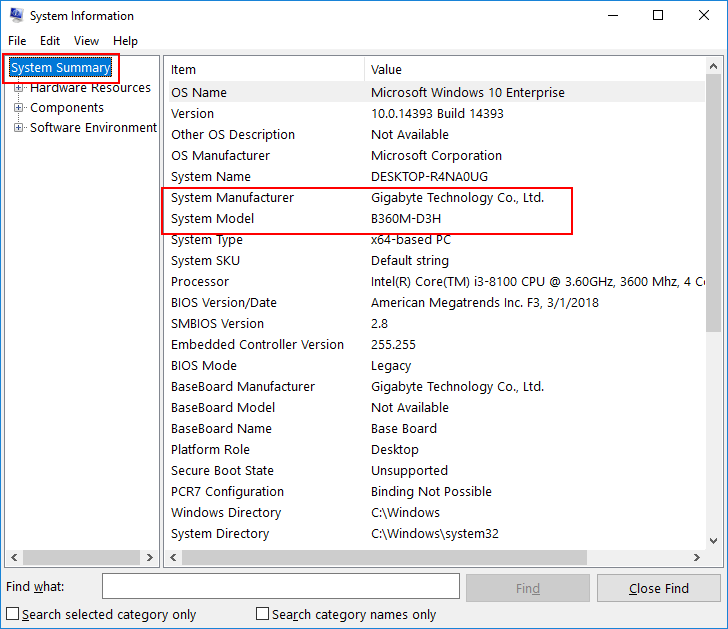
Type msinfo32
Press Enter to open System Information
Look for:
- BaseBoard Manufacturer
- BaseBoard Product
- BIOS Version/Date
Manufacturer-Specific Guides

Step-by-Step Guide
Download BIOS Update
Search for your motherboard's support page using the format:
[Manufacturer] [BaseBoard Product] support Example: "ASRock B550M-C support"
Navigate to the Support or Downloads section
Download the appropriate BIOS version (remember: pre-2022)
Prepare USB Drive
Important: Backup any important files from your USB drive first!
Format the USB drive:
- Right-click USB drive → Format
- Select FAT32 as the file system
- Click Start to format
Extract the downloaded BIOS files directly to the USB drive's root directory
Flash BIOS
Warning: Do not interrupt the BIOS flashing process or turn off your computer!
Restart your PC and enter BIOS (press F2, F12, or Del during startup)
Locate the BIOS update tool (varies by manufacturer):
- ASUS: EZ Flash
- MSI: M-Flash
- Gigabyte: Q-Flash
- ASRock: Instant Flash
Select your USB drive and choose the BIOS file
Confirm and wait for the process to complete
Important: Repeat the process once more with the same file to ensure proper flashing